Saturday, September 3, 2011
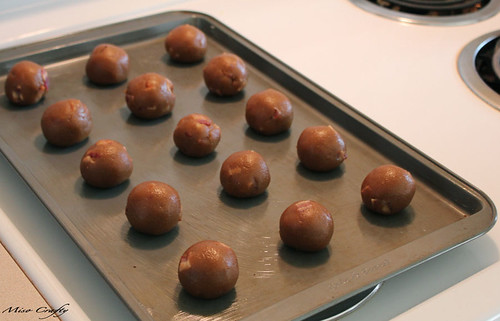
Turtles
Wednesday, August 24, 2011
Weekend Treats
Wednesday, July 27, 2011
Sugar High
Tuesday, July 26, 2011
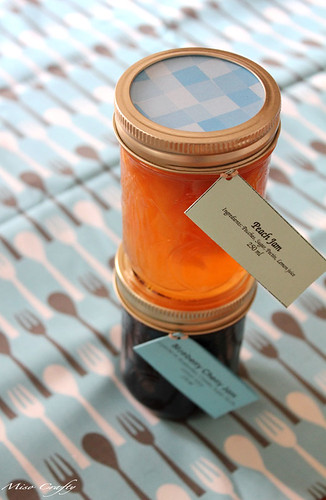
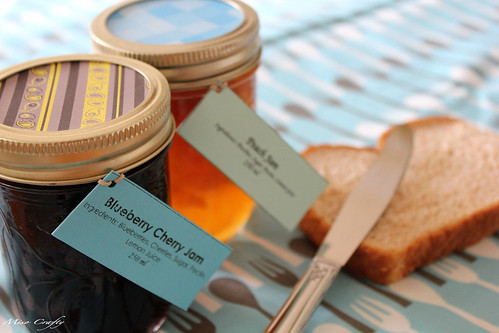
Jam
Thursday, May 26, 2011
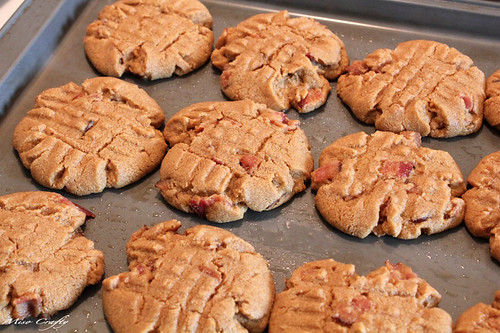
Peanut Butter Bacon Time!
Friday, March 11, 2011
Bananas
Thursday, January 20, 2011
Hello, Martha?
Tuesday, January 18, 2011
Cinnamon Roll Muffins
Friday, December 24, 2010
They didn't have any houses left
Wednesday, December 1, 2010
It's an Irish Creamy Fudge Kind of Day
Wednesday, September 22, 2010
Caramel Baked Apples
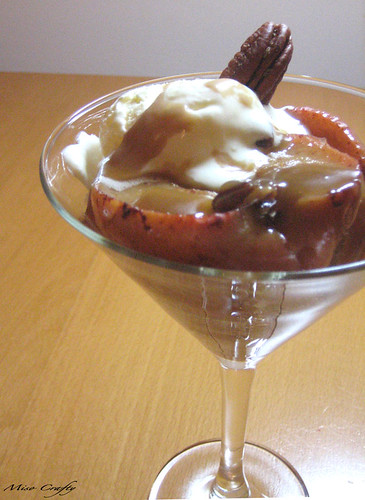
I didn't get up to much over the weekend. I did some knitting but my hands started to get sore, so I stopped for a bit. I did some sewing, but nothing exciting to blog about (I was fixing a zipper on a dress). I did some quasi-baking though. I had taken one of those free magazines that Thrifty's offer at their check-outs. Inside was a recipe for caramel baked apples that had peaked my interest. Brett isn't a fan of dessert, so I rarely get the chance to make anything dessert-like. The recipe was fairly simple and consisted of ingredients that I already had in my pantry. I was a little nervous about the outcome for reasons unknown, and Brett had admitted (after he had inhaled his bowlful) that he wasn't sure if he would like what I was baking up. Solely because our tastes in sweets are very different. We were both pleasantly surprised that the dish came out completely yummy and had left us licking our glasses for every last bit! Unfortunately my photos don't do the dessert any justice. It was night, I had really craptastic lighting, and I think my camera is on the verge of dying. I'd be surprised if it'll last 'til the end of the year.
For those of you who are curious, love apples, love apple pie, aren't a fan of crusts, have a sweet tooth, or all of the above, here's the recipe:
Caramel Baked Apples
(serves 4)
- 3 tbsp butter
- 1/3 cup firmly packed golden brown sugar
- 1 tsp flour
- 3/4 cup whipping cream
- 1/2 tsp pure vanilla extract
- 4 medium-sized apples, halved and cored
- 1 tbsp fresh lemon juice
- 1/2 tsp ground cinnamon
- 1/4 cup pecan pieces
- 4 mint sprigs, for garnish (optional)
Preheat oven to 350°F. Place 2 tbsp of butter and brown sugar in a small pot and set over medium heat. Cook, stirring occasionally, until sugar melts. Mix in flour until well combined. Very slowly whisk in the cream. Bring mixture to a simmer and simmer 1 to 2 minutes, until light;y thickened. Remove from heat and stir in vanilla (make sure this is a good quality vanilla, cause it plays a huge roll in how the caramel tastes!).
Brush the bottom of a 9"x13" baking pan with the remaining butter.
Place the apples, lemon juice, and cinnamon in a bowl and toss to coat. Arrange apples in the baking pan, cut side up. Spoon the caramel sauce over the apples, sprinkle with pecans, cover pan with foil, and bake about 40 minutes, or until the apples are just tender.
Set 2 apple halves in a bowl, spoon sauce over top, and garnish with a sprig of mint. Serve with a dollop of whipped cream or a scoop of vanilla ice cream.
Enjoy!
I halved the recipe, since it was going to be only me and Brett enjoying the treat. I served the apples with some vanilla ice cream in martini glasses, since I don't have actual dessert bowls. I didn't have fresh mint on hand, so I sprinkled a few broken pecan pieces on top and then used a whole pecan as my garnish. Brett made me promise that I would make this again this weekend, it was that good. A few days after making this, even I was still thinking about it! I definitely think this recipe is a keeper!
Thursday, September 16, 2010
Knitting Season
Thursday, August 5, 2010
Summer Indulgences
 Forgive me, I haven't blogged in a week. I've been feeling quite overly exhausted all week and if I wasn't falling asleep while putting the Munchkin to bed, then I was falling asleep on the couch with my knitting still in my hands. I'm really hoping that this sleepy phase passes uber quick, it's making me feel like such a slacker in so many ways!
In the meantime, there really isn't much to report. My knitting has been slow going (thanks to the aforementioned sleepy state I've been in), which makes for poor blogging material. I did bake some apple pies last weekend, but forgot to take any photos and they were gobbled up pretty fast so I couldn't take follow up photos even if I wanted to. Aside from knitting and the pie baking, I've been doing nothing else but enjoying my favourite summer indulgence: fresh fruit.
I'll admit it. In the summer I tend to have a $10 a day habit. It consists of fresh, in-season fruit. Mainly mangoes, blueberries, raspberries, and strawberries. The past week I've been buying quart cartons of blueberries on a daily basis and have been eating them all in one sitting. Yes, I'm ashamed. But it tastes so good! How can I resist? I'm thinking sometime in the next week or two I should really try my hand at baking a blueberry pie. I'm also thinking of trying something that I've been thinking about doing for a while now...and that's make my own jam. That way I can enjoy the fruits of summer year round! Anyone have an easy peasy jam recipe they'd like to share?
Friday, July 30, 2010
Back to Basil
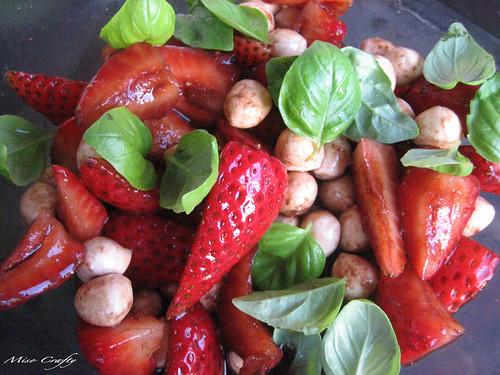 Ever since the weather has been warming up in these parts I've reverted back to eating lightly and pretty much often raw but fresh foods only. Since basil plants everywhere have been flourishing, I've also gone back to eating everything with basil. Unlike last year's plant, this year's produces small-ish leaves. But tons of them. So I can't complain.
I've been eating my all-time favourite Caprese salads like they're going out of style. The past week and a bit though, I've been substituting strawberries instead of the tomatoes. A version that I had at Becky's house for the Bitchy Bees' potluck. It was so yummy that I had to make it for myself...a few times!!
Wednesday, June 2, 2010
Chocolate-y Goodness
 I came to the realization a few days ago that this blog has slowly been deviating away from the "crafty" part and has been turning into a blog about knitting. To those readers who do not knit or know nothing about knitting, I am truly sorry. I swear, I'm trying to venture back out into other crafty endeavors. It's just that trying to find the time to sit down and sew during "normal" hours (i.e. when the wretched neighbour downstairs isn't home to make a fuss about the so-called excessive noise) without the Munchkin around is next to impossible. It's times like these that I really wish I had family around who would be willing to look after him for a few hours a week. I really don't know how other stay-at-home moms do it!
So, until I start living up to my blog's moniker, I give you my latest baking creation: Chocolate Brownie Peanut Butter Cups! I saw the recipe for these in a magazine at the doctor's office a week ago and was finally able to make them for mine and Brett's anniversary this past weekend. I didn't get the chance to write down the recipe, but I did remember that it involved a boxed brownie mix and mini Reece's Peanut Butter Cups. I think the recipe calls for a fudge brownie mix, which my nearest grocery store did not have (not unless I wanted to the low-fat version...but seriously, a low-fat brownie??? What's the point then??). Since the store didn't have what I was looking for I had to settle for the frosted brownie version. The recipe also called for mini aluminum baking cups that are a bit larger than the Reece's PB cups, but since those are hard to find I just used the regular sized aluminum ones instead. I personally don't think it really matters cause either way they come out absolutely full of yummy goodness. You would just get more out of the mini version.
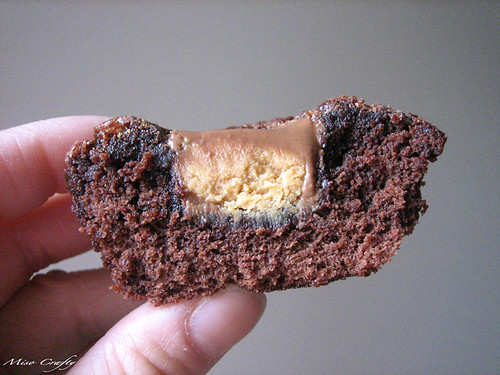 I made these while Brett was at work (so that I could surprise him when he got home) and kinda wished I had waited until he was home cause these are truly the ultimate treat still warm. By the time he did get home they had already cooled down, but that didn't stop him from consuming 3 of these bad boys in a 5 minute span! I think I'll definitely be making these again sometime soon!
You want to make some? Here's how you do it:
You'll need:
1 box of either Betty Crocker or Duncan Hines Brownie Mix - preferably a fudge kind
2 eggs at room temperature
1/3 cup water
1/4 cup vegetable oil
1 package Reece's mini Peanut Butter Cups (you may need more if making the mini version)
1 box of aluminum foil baking cups (the actual recipe calls for the 2" mini ones, I used the large)
- Preheat oven to 350°F.
- Place the baking cups in a muffin tin, or if using the minis place on a baking sheet (the aluminum is strong enough to hold its shape, so it doesn't need the support of a mini muffin tin!)
- Combine brownie mix, along with the contents of the fudge packet from the mix (or in my case, the frosting packet), with the eggs, water, and oil
- Stir with a spoon until well blended (about 50 strokes)
- Fill each cup with 2 tablespoons of batter for the minis, and about 3 tablespoons for the regular size (I made it so that it was about 3/4 full)
- Bake for 10 minutes and remove from oven
- Push 1 unwrapped Reece's PB Cup in the center of each brownie until even with surface
- Bake 5-7 minutes longer (you don't want an over-baked brownie or it'll end up dry!)
- Cool 5-10 minutes in pan, then move to a cooling rack to cool completely.
Voilá! Enjoy!
Thursday, May 27, 2010
Bananas
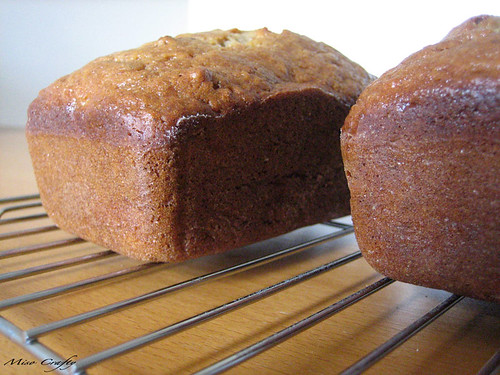 It's been extremely quiet on the crafting front here, which makes for poor blogging topics. On Saturday Brett started to feel sick and was trying his hardest to fight off whatever it was that wanted to invade his immune system. He lost. On Sunday, his birthday, he had a full-blown flu. Inevitably the Munchkin got a titch of what was plaguing Brett and has been feeling a little under the weather and has been battling a running nose. In true domino effect style I started to feel a little under the weather (not to mention a little depressed since the sun has been MIA the past few days!). I've been spending the majority of my time keeping house, keeping up with laundry demands, playing nurse, and sleeping as much as possible.
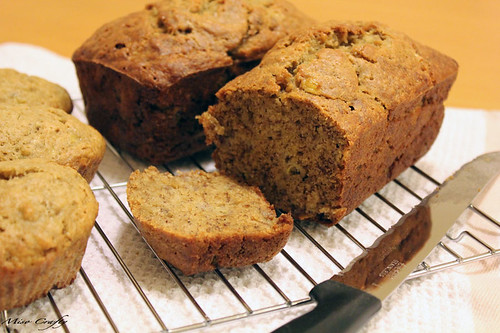
Amidst the chaos I managed to bake some more banana bread using the recipe I mentioned from this post. I was going to make banana chocolate chip muffins using Wendy's modifications, but realized that I didn't have any chocolate chips on hand - which was extremely weird cause I always have chocolate chips on hand (I used to bake Brett chocolate chip cookies on a weekly basis...but then again, that was in the pre-Munchkin days). Then I was going to make mini muffins as suggested by Stephanie, but then realized that it would take a little longer to scoop out 30+ spoonfuls of batter to fill up a mini cupcake tray (note to self: must purchase a small ice cream scoop for such occasions!). I didn't have that time. So mini banana loaves it was going to be.
Let's just hope that these loaves last longer than the last one...
Friday, May 21, 2010
Our Daily Bread
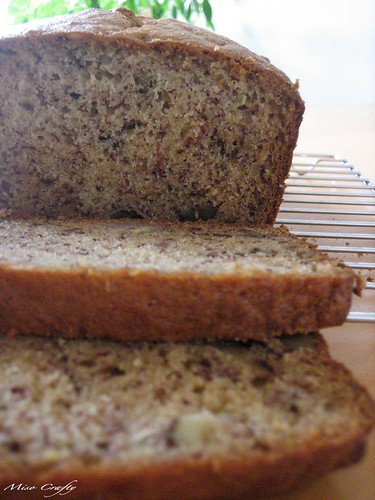 I baked this a few days ago after realizing that the Munchkin is a bit particular as to how ripe of a banana he will eat, resulting in us having a bunch of spotty bananas on our kitchen counter. The banana bread is all gone now, with the majority of it eaten within the hours of it coming out the oven. I felt the need to blog about my banana bread solely because I get into these food phases where I become completely obsessed with consuming a certain food. I kid you not. You can ask my past roommates. Once, I was sooo food obsessed with chili that I ate it for 2 months straight. I ate it for lunch, dinner, and sometimes as a snack. Before that, I was on a nachos binge. I ate plates of nachos for a whole month!
So, I thought by blogging about my banana bread that maybe I can break the cycle. The last thing I need is to be obsessed with eating banana bread! I used this recipe from the Williams Sonoma website, but really I have yet to encounter a banana bread recipe that didn't come out yummy. I've always made mine with straight up butter and so I was curious as to how it would taste with the addition of buttermilk that the Williams Sonoma recipe calls for. My verdict: pure yumminess! I'll definitely be using this recipe again when the need/urge to bake banana bread strikes.
In the meantime I still have half a bunch of very ripe bananas that need to get used up. The thought of banana chocolate chip muffins having been popping into my head. I just need to find a recipe for it. But that might be too much work for right now...especially since I already have a bread recipe that I know is great. Hmm, maybe I should just bake another loaf of banana bread...
Thursday, April 8, 2010
Scones and Other Foods
 I baked these dee-lish Gluten-Free Raspberry Scones the other day after seeing them on Mae's blog and asking her if she could share the recipe. I was a little hesitant at first to try them out, as previous experiences with gluten-free foods have left much to be desired. But I trust Mae's tastes (no pun intended!) and went ahead and baked these bad boys up. And WOW! Am I ever happy that I did! These so beyond delicious that I ate 2 in a row (they were, after all, straight from the oven and oh so fresh and warm!), and the Munchkin LOVED them as well! He kept tugging on my sleeve to give him another bite and when there was no more scone left on my plate he was yanking on my hand to drag me to the kitchen table where the rest of the scones were cooling! I pretty much call these scones "guilt-free baking" since not only are they gluten-free, but they are dairy- and egg-free as well! Besides being vegan to boot, they seriously took only 5 minutes to whip up (that's not including baking time!). I'll definitely be baking these a lot. I'm already thinking of what other fruits I would like to try in this recipe!
 Brett and I already try to buy organic and local as much as possible, and we're currently thinking we should look into local farms so that we can buy properly raised chicken meat. Since watching Food Inc I've been really conscious of everything going into my body, not just for my own personal health, but because I'm also a breastfeeding mother. Having a kid has really put a lot of things in a different perspective, and has got me thinking a lot. So much so that I think I need to make a new 101 goals list!
Hmmm...what's everyone been eating lately?
Tuesday, February 9, 2010
Sooo...Vanilla!
 Last week I accomplished one of my 101 goals: make my own vanilla extract. I've been wanting to do this for quite some time now but never got around to doing so, and since I do a lot of baking and plan on doing a ton of baking this spring/summer I figure it's only fitting to make my own extract now. After some searching on the internets I discovered that the recipe for making vanilla extract is pretty much the same across the board. This is how I made mine:
You'll need:
- Good quality vanilla beans
- Vodka or rum
- An airtight bottle, preferably a glass one
 I got my vanilla beans at a local health store. I'm not sure how high quality they are, as they are the same brand that every grocery store I've been to in Victoria carries. The majority of websites I visited used vodka for their extracts so I decided to follow suit. The ratio for bean to vodka varies, but the consensus seems to be a cup of vodka per bean. I had made a really small bottle of a rum version but discovered too late that the cap was faulty, and so when it had somehow tipped over in the cupboard all the rum leaked out. Oh well, I have plenty of the vodka variety to last me pretty much forever. But one day I would like to try out the rum version just to see how much of a difference there is. I couldn't find a small bottle in the house so I decided to just re-use a wine bottle left over from Christmas celebrations. I figured since wine has to be kept airtight then it'll work for this little project. A lot of websites recommend using a mason jar but I don't have any unused ones on the house and didn't really want to buy a case just to use one jar.
Anyways, here's what I did:
Clean your bottle of choice very thoroughly and sterilize. Once your bottle is dried and ready to go, take the vanilla beans and slice the beans in half length-wise, leaving a good inch or two intact at one of the ends (so they look like wishbones). You can't tell in my photo below, but they really are sliced open.
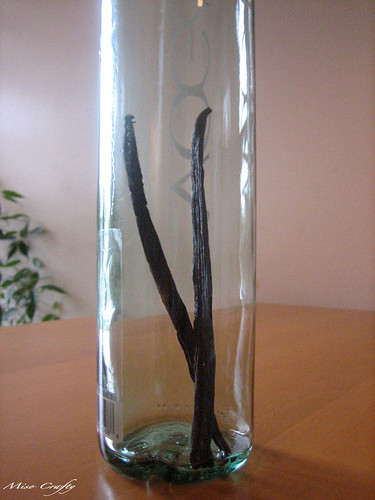 Pop the beans into the bottle and pour in enough vodka to cover the beans completely. Store the bottle in a cool, dark place and shake every few days. After 6-8 weeks you've got vanilla extract ready to be used! Voilà!!
Over time the extract will get darker and more concentrated in flavor. The beauty of making your own extract is that when you are starting to get low all you have to do is add more vodka and vanilla beans and let sit for a few weeks until using again. You basically have a bottle of never ending vanilla extract! How sweet is that?? I added the month and year to my bottle label to see just how long my bottle lasts. I'm also thinking of adding another bean or two to my bottle, as I wouldn't mind having my extract super vanilla-y. And depending on how it works out, maybe transferring it to a smaller bottle. But we'll see. After the "brewing" time is up, I'll take another photo and show you guys how it panned out. I simply cannot wait to give my extract a try!
'Til then, happy baking y'all!!
Saturday, February 6, 2010
I want candy!!
 I'm not a huge Valentine's Day fan, but I'll use any excuse to be able to decorate the house in pink that I can and not get any slack for it! So since V-day is right around the corner I thought I would make a few V-day related crafts to put around the house. Starting with these bad boys (see above, sorry...the lighting was crap the day I took these photos!). I saw these whilst perusing the Martha Stewart website trying to find cookie recipes. What are they? They're bonbon-filled hearts! Ok, so mine aren't filled with bonbons. I opted to fill mine up with the must-have cinnamon heart candies and large conversation hearts, as well as seasonally wrapped Hershey Hugs and Kisses, jelly beans (in pinks, reds, and white of course!), and just for Brett - peanut M&Ms!
 These darling little hearts are super easy to make and are truly easy on the wallet, which is great if you don't want to spend a lot of moola (or any) on decorations for such a day as Valentine's. I used leftover card stock from Christmas and scrapbooking card stock, that for some weird reason I had laying around in my sewing closet. The ribbons were from my stash and all I needed to purchase was the candy. Brett and I are both chocolate lovers and so V-day related sweets were bound to cross our threshold, so I figured why not have a cute way of holding our edible goods (not to mention easy access!) instead of having the stockpile scattered all over the computer desk?
 You can find the directions to make your own here. But I must warn you, some steps really aren't clear. Like in step 7: Slide fold A behind fold B. The diagram shows absolutely nothing. So take note that what Martha wants you to do is to align the folded parts that's in the middle together so that they are one and you end up with 2 compartments. Another useful tip: the so-called heart template on the website is a useless thumbnail photo, so what I did was trace the outline of my folded up square (so you know how big your template needs to be) on another piece of paper, cut it out, fold the template paper diagonally so that you have a triangle shape, and draw your own heart. Cut that out and voilà! You've got yourself a template without having to waste a million sheets of paper trying to get Martha's version to match your square.
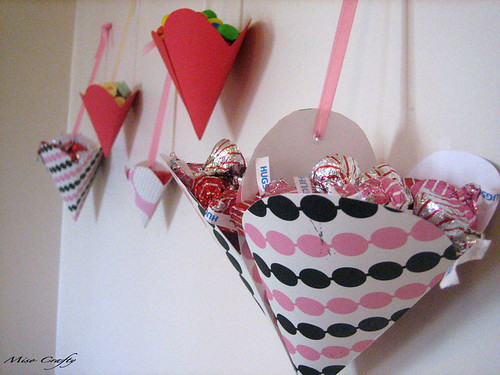 I like these so much that I'm thinking of getting some pastel colored card stock and making a few for Easter. I'm not sure if I'd cut out a heart shape, maybe turn them into cones and then embellishing them to jazz them up a bit. The beauty of this project is that you can make the holders as big or as small as you want. I can already picture mine holding Cadbury mini eggs, foil-wrapped egg shaped chocolates...and big ones with shredded green paper to cradle decorated eggs...ooohhh...the possibilities!
