
 **Sorry for the über crappy photos! The weather hasn't been that great and it's just been getting so dark so fast!
And now for a hush-hush sewing project! I know, I know...I've been doing a lot of secretive crafting! How dare I do that! But this project was a must for me. I've got quite a few knitting and weaving on the go as of late and they have either been sharing space in my other project bag or put into an ever-growing pile in a corner of my living room (where the little one can't get at it, of course!), and the boxy bags that I've made previously just aren't big enough to hold any of them. So I really did need another large project bag!
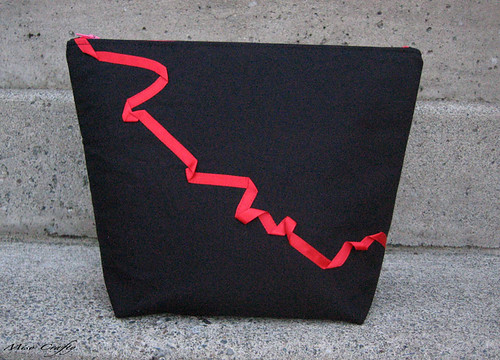
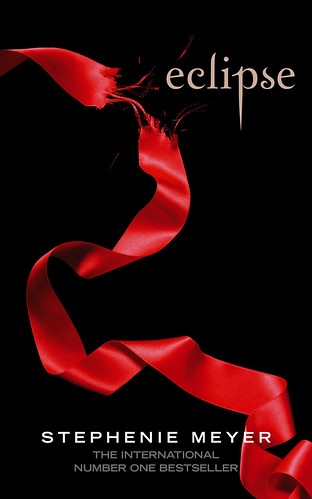
The second I made the decision to sew up another bag there was no question in my mind about what I wanted it to look like. I immediately knew I wanted it to be Twilight related and the only thing that came to mind was the swirling ribbon from Eclipse. I have always wanted to do a project that entailed that ribbon design and here was my chance to do so. My inspiration and the look I was going for is from the Eclipse book cover:
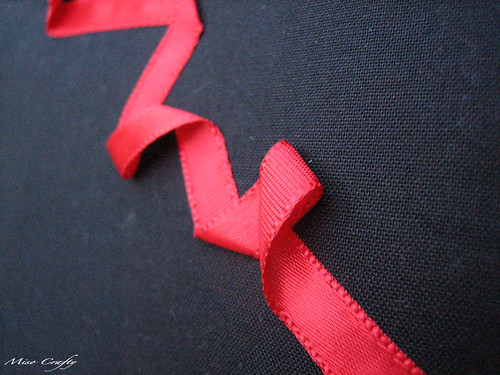
And closeups of that inspiration:
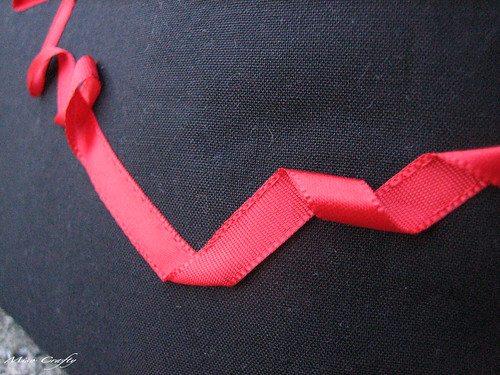 I tried to do the broken/torn ribbon section, but after a few attempts it just didn't look right. It looked really sloppy or like a my one year old son had attacked it. Either way, it just looked like crap. So I nixed that idea and went with just the swirling. I'm quite pleased with how it turned out but unfortunately I couldn't take any photos that could actually justify the effect. So you'll just have to trust me that the design really does look cool and is much better in person! The twisted parts are even 3-D and pop right out of the fabric and gives a nice overall texture to the design.
I didn't use canvas for the exterior, since I didn't any black canvas in my stash and didn't feel like dyeing canvas to suit my needs as I didn't have the time to go that extra mile. Instead I used black Kona cotton (which I have a ton of) that had been fused with some heavy interfacing. If I were to make another bag with this design, I don't think I'll be doing that again. I think the heavy interfacing made the bag too stiff (and not in a good way!) and causes weird wrinkles after slight handling. I just might have to experiment with fusible fleece or something similar to get the body, shape, and hold as my other project bag if I ever plan on using Kona cotton or other quilting weight fabric for the exterior of this bag.
The idea to use a simple red cotton fabric for the lining crossed my mind, but then I saw the red hearts fabric in my stash and knew it would be perfect for this bag. It was a bonus that the fabric was in shades of red, but I thought the hearts could symbolize my love for Edward (yes, I'm all about Team Edward...but after seeing all those trailers for New Moon and catching eye-fulls of a shirtless Jacob, well, I could be persuaded to join Team Jacob...). Then again, it could symbolize the love for Jacob, or the Twilight Saga in general, or even the ongoing love triangle that happens in third installment of the series...yes, as you can tell, I've thought a lot about this. I'm a dork like that.
 Anyways, back to the bag. I used the same dimensions as my last project bag and had only changed a few things. Instead of sewing my label on the inside pocket I had sewn it on the back of the bag, under the zipper. I forgot to take a photo of that, but that's more a design thing and has nothing to do with the function of the bag. I did however, change the pocket.
 On my other bag I had sewn in a large solo pocket that was big enough to hold needle packages, bits of paper, my needle/stitch gauge, and whatever else you can put in a pocket. After a while the pocket started to gape a bit which annoyed me from time to time. I also found myself digging for a pen or crochet hook numerous times. So to solve all those issues I changed the height of the pocket a bit so that I could divide up the pocket a bit to accommodate 2 slots for a writing utensil, a crochet, and some DPNs. The pocket itself is still big enough to hold my needle/stitch gauge and some scrap paper. Simply perfect!
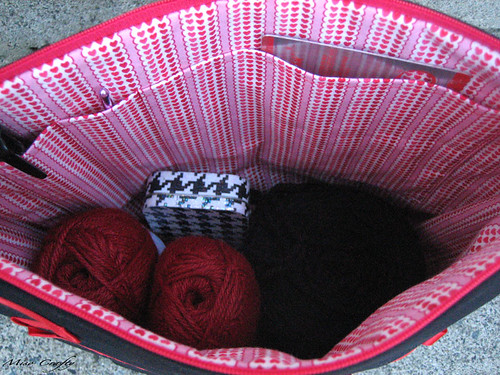 I really love how this bag turned out! I'm already thinking of sewing up some more bags...and not just for knitting and weaving projects, but for other things as well...like for an on-the-go diaper bag (now that the little one is no longer high maintenance and needs a million things toted around with him) so that I can stash a few diapers, a little case of wipes, and maybe some treats. I'm sure my Mom would like a bag for her glucose monitor and medications, since she's been using an extra large Ziplock bag to tote them around. Hmm...what else can I make a bag for...?
That bag turned out really good. I love that the ribbon is 3d in some areas. It looks really cool. I really need to make some project bags for my knitting projects. They are getting out of control.
ReplyDeleteThanks Kat! Yes, I need to make more project bags....my projects are getting out of control too...I think I need to make a deal with myself - no more starting projects until what I got going already is finished! Ugh...the downside of being involved in so much crafting! ;)
ReplyDelete