
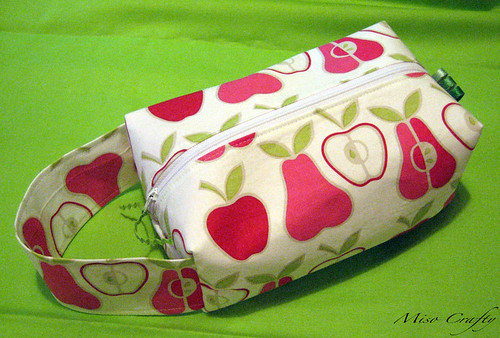
 I've been seeing this type of bag all over the place...at my knit nights, online, in the stores...although, to buy this bag in a store would be a pretty penny...a penny that I don't really want to dish out, especially when I know I could make a bag like this myself. So I figured I might as well try my hand at making my own.
I knew the construction of the bag immediately, as I've made a bag with a bottom similar to this bag's sides before. This bag is a relatively simple and quick project that could be made in less than an hour, but I had to go and make it a little harder. Unless it's made with felt or some other non-fraying fabric, I hate making things with unfinished seams and/or edges. I contemplated making this bag with a lining to enclose the seams and just leaving a small opening to hand-stitch afterwards. But anyone who knows me knows that unless it's embroidery, I like to avoid hand sewing at all costs. Not to mention that this method could make for a flimsy bag structure. I would like my bag to stay boxy and not cave in. I didn't think this method would measure up. So I moved on to the next idea. And that was to sew french seams. But I wanted to line the bag and I think that the double layer would make up to be too bulky for a seam. Yeah, I'm starting to feel like Goldilocks here.

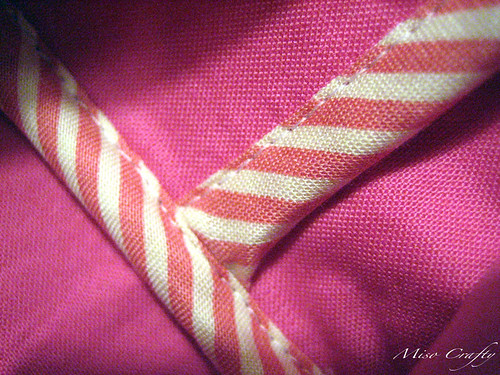 I ended up with sewing bias tape to the seams. I had to dig deep into my stash of notions cause all I have really is extra wide bias tape. At the very back of my ribbon drawer I found this yummy Japanese bubblegum pink and white striped bias tape by Lecien, that I think I had bought from Superbuzzy a few years back. I really didn't feel like making my own bias tape, so I was contempt with using the bubblegum pink on a project that featured bright, vibrant, hot pink.
I used the same Alexander Henry Apples and Pears fabric as the asian pear stuffie that I had made earlier this month. I used hot pink Kona cotton to line the bag and a white zipper. I thought about using this lime green Kona that I have that matches the green of the leaves perfectly, but didn't want to mess with the stack of fabric that was on top (I know, lazy...). I thought about using a pink zipper too, but it just threw the entire bag off so I stuck with the white.
 I added a piece of tri-color green ribbon that was also in my stash, to grasp onto when trying to zip up the zipper when it was open. I had bought this ribbon at Dressew about 5-6 years ago and have always wanted more. I never saw it again after the first time I bought it. I found out from one of the ladies that work there that the ribbon was dead stock from the 60s and that they had only received one wheel of it. All I remember was that I had bought a few metres of it with no project in mind for it, but I liked the color so much that I got anyways. And at 25 cents a metre, why not?
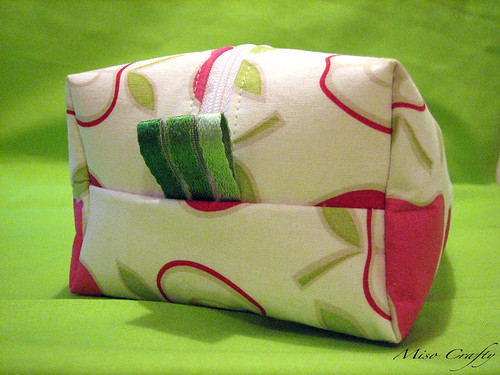 I also added a little piece of lime green baby rick rack to the zipper pull. I should have sewn a little bit of it together, rather than tying it into a knot. It's not a big deal, but I think aesthetically it would look nicer if it was a straight line of zig zag and not splayed out.
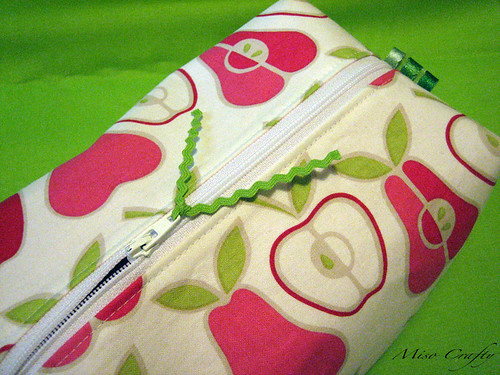 The handle was a little tricky. I wasn't sure if I wanted it long enough to dangle off my wrist or just enough to hold it. I chose the latter. I really couldn't see myself using this around my wrist. In the end the strap turned out wider than I wanted it to. I also don't really care for the height of the strap either and would like to see an overall smaller one on this, but really wanted the apples and pears print to run along it.
  The purpose of me making this bag is so that I have something to put various knitting needles in when I go to knit night. Right now I'm using a large Ziplock bag and it's starting to get really worn out, and I would like to replace it with something more Earth-friendly.
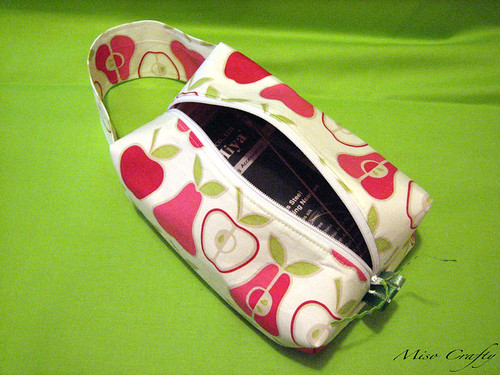 The only thing I don't like about this bag: how stiff it is. I wanted the bag to hold its structure, so I used heavy fusing on both the outer and lining fabrics. This just made the fabric too crisp with no chances of flexibility without making the fabric "bubble". I plan on making another bag to hold small knitting projects, so I think I'll stay away from the heavy duty fusing! Now that I got the logistics of this bag figured out, I'm going to play around and experiment with different sizes. With that said, I don't think I can cross this off my sewing to-do list just yet.
Fabulous! I love it! Time to do a tutorial for people like me :)
ReplyDeleteOh. Oh my. I have a deep love for that.
ReplyDeleteBest not bring it to knitnite.... you might not see it again. ;)
(just)Jennifer
Thanks guys! I totally needed that, here I am thinking my bag was a meh item! Your comments made my day!
ReplyDelete